My First Post
Contents
hugo创建blog
网工172-陈迪荣 2021/6/5 9:48:03
搭建博客可以看这篇下面的reference:
https://www.lttzz.cn/post/hello-world/
https://olowolo.com/post/hugo-quick-start/
hugo new不是可以新建博文么,新建完了用文本编辑器(推荐typora,支持markdown)写好文章,然后hugo server就可以浏览器看渲染后的博客,这只是本地使用 如果要把博客托管到服务器上,可以自己买服务器,运行诸如nginx之类的web服务器,或者用免费的GitHub Page
git的简单教程:http://www.ruanyifeng.com/blog/2014/06/git_remote.html
总结:
创建:hugo new post/my-first-post.md
部署:hugo server -D
!!!每次写好文章后重新推送。
- 首先将文章的draft修改为
false- cmd下输入
hugo在public下生成静态页面- 在public下使用
git bash heregit add .git commit -m "提交的描述信息"git push origin main
网上windows教程 https://www.cnblogs.com/fnng/p/7110957.html
博客主题预览:https://hugo-theme-even.netlify.app/post/even-preview/
陈:github
文本编辑器typora
安装教程:https://blog.csdn.net/qq_42512401/article/details/97279495
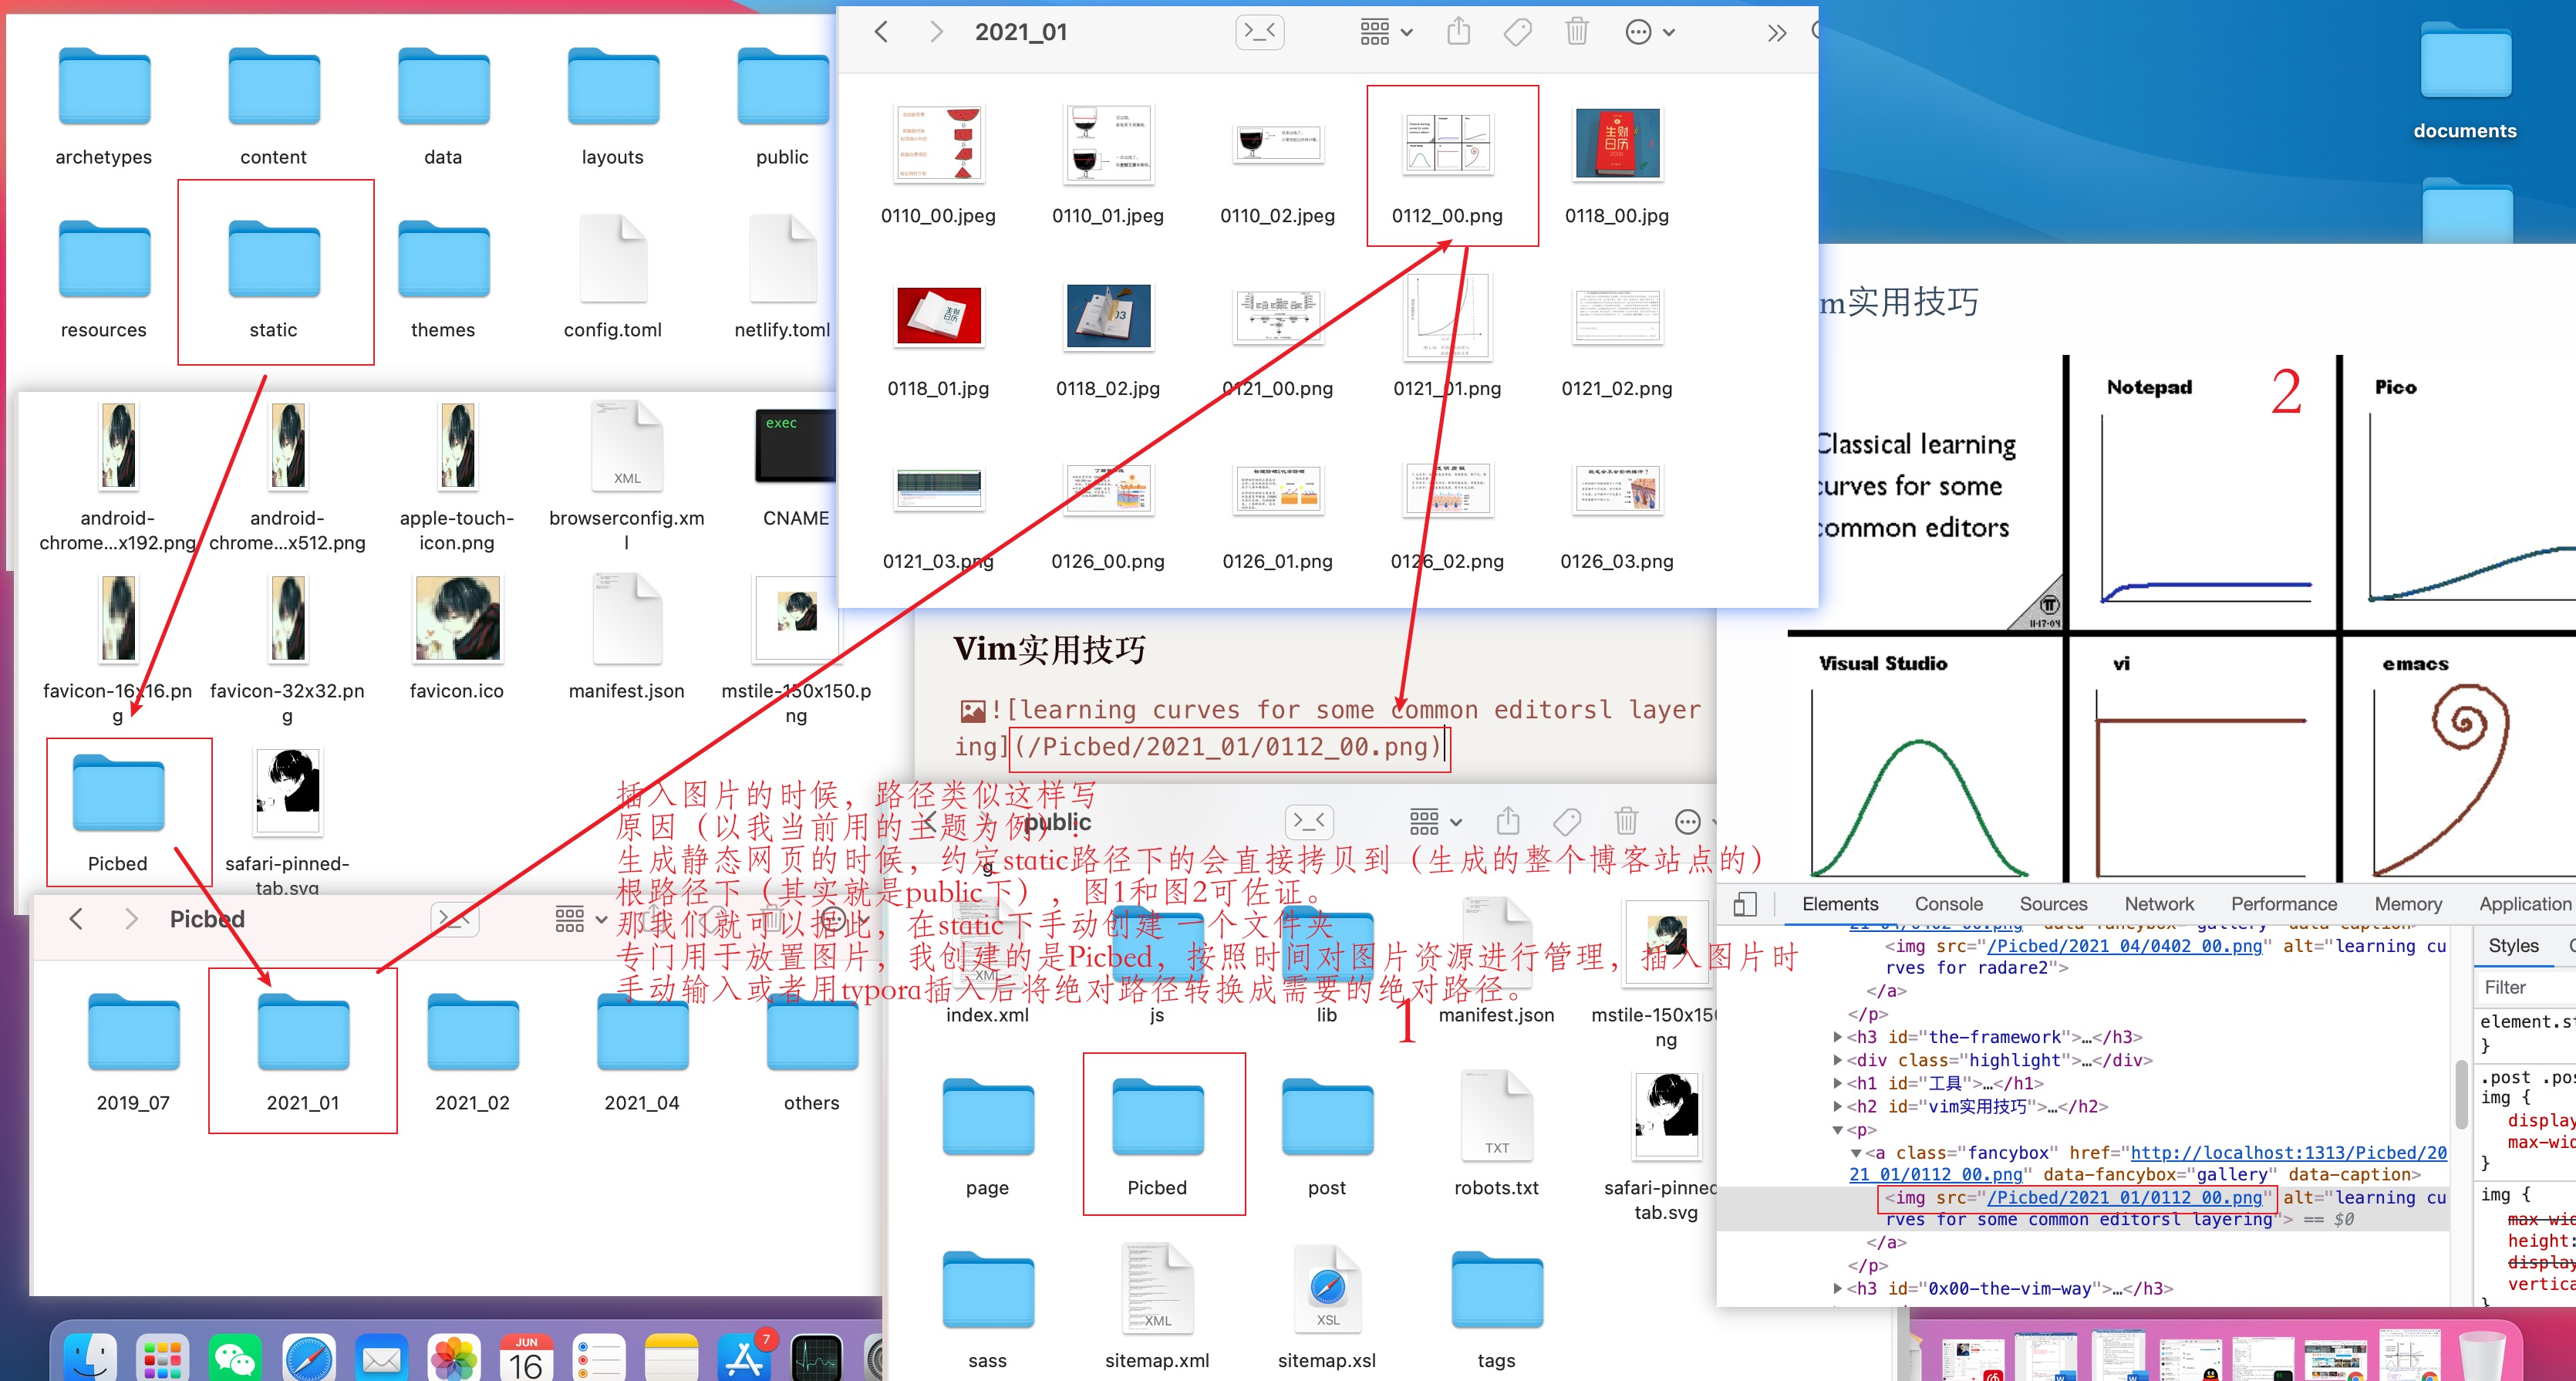
插入图片的方法:在static下创建一个images文件夹用于专门放置图片,同时按照时间对图片资源进行管理,插入图片时手动输入![]+(/images/图片名)
图片缩放:

***表示分割线,一条横线
截图贴图软件:snipaste
Notepad++:https://notepad-plus.en.softonic.com/download
https://en.softonic.com/download/notepad-plus/windows/post-download
Front Matter
文本的头–前言!
Front-matter:Hexo官方文档
Hugo 支持TOML、YAML、JSON格式的Front Matter。
以下列出一份完整的YAML格式的Front Matter,除了必要的date和title参数外,你可以有选择性的使用其他参数。
总结:结合所用主题,暂时:tags表示便签;categories表示分类。
均在目录导航栏中可看,可在config中配置导航栏。
tags: [“Hugo”,“Github”] categories: [“HelloWorld”]
|
|
Markdown 教程
https://www.runoob.com/markdown/md-tutorial.html
总结:没啥用,基本都有快捷键
在GitHub上搭建个人博客
Vscode+git下载安装
https://zhuanlan.zhihu.com/p/57361697
https://blog.csdn.net/kutawei/article/details/105421545
|
|
推送后出错?
出现错误的主要原因是github中的README.md文件不在本地代码目录中
进行合并git pull –rebase origin main
合并之后再重新推送。
如果你clone下来一个别人的仓库,在此基础上完成你的代码,推送到自己的仓库可能遇到如下问题: error: remote origin already exists.表示远程仓库已存在。 因此你要进行以下操作: 1、先输入git remote rm origin 删除关联的origin的远程库 2、关联自己的仓库 git remote add origin https://gitee.com/xxxxxx.git 3、最后git push origin master,这样就推送到自己的仓库了。
https://blog.csdn.net/wangsen329027415/article/details/79861841
Author kong
LastMod 2021-06-05