参考链接
2
ssh
创建一个项目的主要步骤:
前提:安装Anaconda,LINUX
1
2
|
wget https://repo.anaconda.com/archive/Anaconda3-2022.05-Linux-x86_64.sh
sh Anaconda3-2022.05-Linux-x86_64.sh
|
1、创建虚拟环境,并切换 blog 删除
1
2
3
4
|
conda env list
conda create -n syft_env python=3.9 --y#创建
conda env list
conda activate syft_env#激活,切换
|
1
|
conda install python=版本号
|
创建环境失败
使用清华镜像源
1
2
3
|
conda config --add channels http://mirrors.tuna.tsinghua.edu.cn/anaconda/pkgs/main/
conda config --add channels http://mirrors.tuna.tsinghua.edu.cn/anaconda/pkgs/free/
conda config --set show_channel_urls yes
|
2、conda安装jupyter lab以及jupyter notebook
1
|
conda install -c conda-forge jupyterlab
|
3、安装pip添加国内镜像 linux
1
|
sudo apt install python3-pip
|
更新pip 2
镜像
1
|
python3 -m pip install --user --upgrade pip
|
pandas
1
|
pip install pandas -i https://mirrors.aliyun.com/pypi/simple/ --trusted-host=mirrors.aliyun.com/pypi/simple
|
4、Docker???
5、torch linux 官方 离线安装,2
安装torch之前安装cuda 和cudnn?不需要
查看cuda版本
1
|
conda install pytorch==1.4.0 torchvision==0.5.0 cudatoolkit=10.1 -c pytorch
|
6、pysyft blog
1
2
|
pip install syft[udacity] -i https://pypi.doubanio.com/simple/
pip install syft[udacity]==0.2.4 -i https://pypi.doubanio.com/simple/
|
1
2
3
4
5
|
pip install 包名 -i http://pypi.douban.com/simple/ --trusted-host pypi.douban.com

-i https://pypi.tuna.tsinghua.edu.cn/simple

-i http://mirrors.aliyun.com/pypi/simple/ --trusted-host mirrors.aliyun.com
|
switch cuda code blog
windows下安装torch
 1
 2
 3
 4
 5
 6
 7
 8
 9
10
|
pip install torch==1.10.1+cu113 torchvision==0.11.2+cu113 torchaudio==0.10.1+cu113 -f https://download.pytorch.org/whl/torch_stable.html

nvidia-smi
CUDA Version: 12.0

C:\Users\DELL>nvcc --version
nvcc: NVIDIA (R) Cuda compiler driver
Copyright (c) 2005-2018 NVIDIA Corporation
Built on Sat_Aug_25_21:08:04_Central_Daylight_Time_2018
Cuda compilation tools, release 10.0, V10.0.130
|
window切换环境
如果需要不同的python版本需要修改系统环境变量
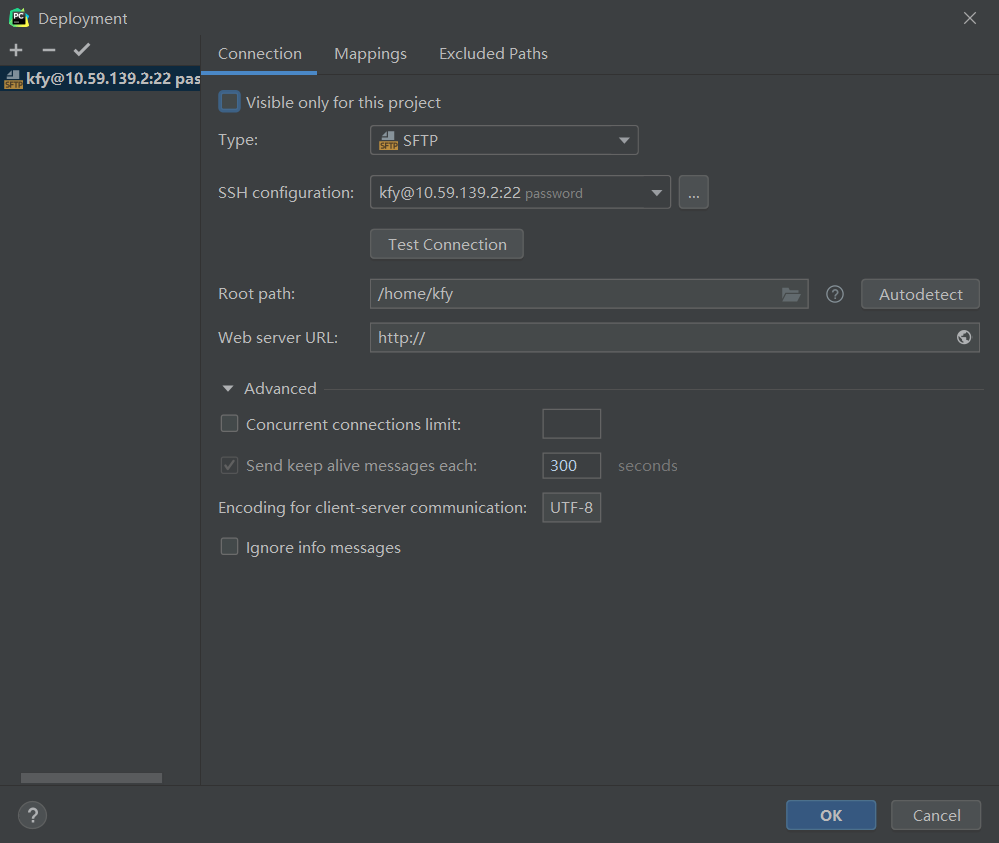
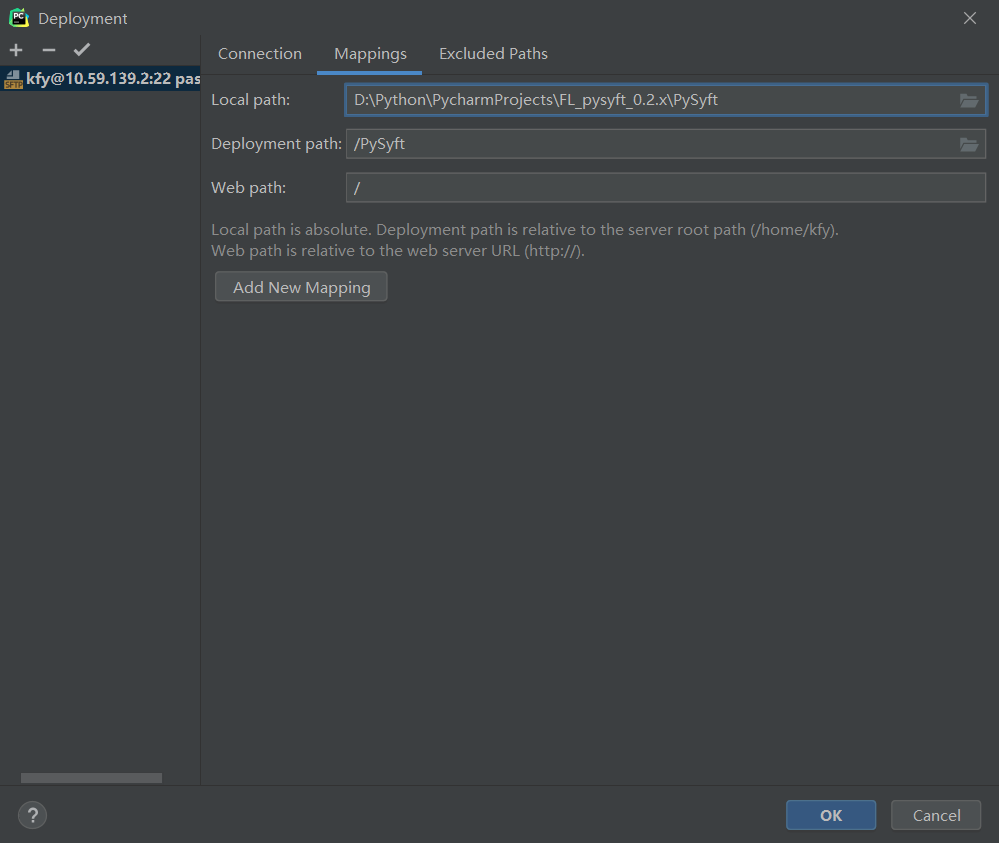
pycharm连接服务器:【blog】2
1
2
|
nvidia-smi# 查看空闲显卡
CUDA_VISIBLE_DEVICES=0,1#指定显卡
|
githubhttps://zhuanlan.zhihu.com/p/456089210
wsl
https://blog.csdn.net/weixin_52802958/article/details/122631592
https://blog.csdn.net/weixin_50321412/article/details/124592284
Linux跑论文实验踩坑记录:
https://zhuanlan.zhihu.com/p/570224649
pdb调试 [1] [2]
转到循环的最后一行(使用next或n),然后使用until或unt。这将带您进入循环之后的下一行。
命令 解释
break 或 b 设置断点
continue 或 c 继续执行程序
list 或 l 查看当前行的代码段
step 或 s 进入函数(进入 for 循环用 next 而不是用 step)
return 或 r 执行代码直到从当前函数返回
next 或 n 执行下一行
up 或 u 返回到上个调用点(不是上一行)
p x 打印变量x的值
exit 或 q 中止调试,退出程序
help 帮助
tensorboard
1
2
3
|
tensorboard --logdir=./

ssh -L6006:localhost:6006 kfy@10.59.139.1
|
命令行打印
1
|
python3 main.py --gpu 0,1 --work-type train --model fedmatch --frac-client 0.05 --task ls-biid-c10 2>&1 | tee ./outputs/output.log
|
screen auto 1
1
2
3
4
|
创建镜像:screen -S test
退出镜像:ctrl+a+d
查看列表:screen -ls
打开:screen -r 31389.test
|
运行完自动关机
pdb设置断点
1
2
3
|
import pdb

pdb.set_trace()
|
压缩,1
1
2
|
zip -r test.zip ./*
将当前目录下的所有文件和文件夹全部压缩成test.zip文件,-r表示递归压缩子目录下所有文件.
|
ppt画图
回到PPT,点击“ 设计 ”“ 幻灯片大小 ”“ 自定义大小 ”
宽度改为50,高度改为28,点击“ 确定 ”。
点击“ 最大化 ”https://learn.microsoft.com/zh-cn/office/troubleshoot/powerpoint/change-export-slide-resolution?source=recommendations
visio 激活
https://blog.csdn.net/weixin_42078172/article/details/107447724
https://www.bilibili.com/video/BV16G411Q79c/?vd_source=ad42090d7d6fcdfc144126ae0e2884ac
https://blog.csdn.net/rt_tryqc/article/details/130408760
endnote 出现乱码
打开word文档-选项–高级–显示文档内容–显示域代码而非域值,取消选中改选项即可